
Guide
How to measure wall areas for insulation from a PDF
Draw the wall once along the plan, give it a height, and TrueScale works out the wall area for you.
Insulation is quoted by the square metre, but a floor plan only shows walls as lines. The usual way is to measure the length of each wall, look up the ceiling height, and multiply. TrueScale does that multiplication for you, keeps the numbers together, and adds them up across every page.
This guide uses the starter Insulation tool set that comes with TrueScale. Its tools are examples: rename them, change the specs and rates, or build your own.
Before you start
Set and check the scale on every page you will measure. If you have not done that yet, start with How to set the scale on a PDF drawing. A wall area is a length times a height, so any error in the scale shows up in your areas too.
Then open the Tool Chest with Alt+X and find the Insulation set. It has:
- areas for ceiling insulation, wall insulation, underfloor insulation and roof blanket;
- a wall insulation run, which is a wall run: give it the wall height and it gives you the wall area;
- a batts count, for when you price by the pack.
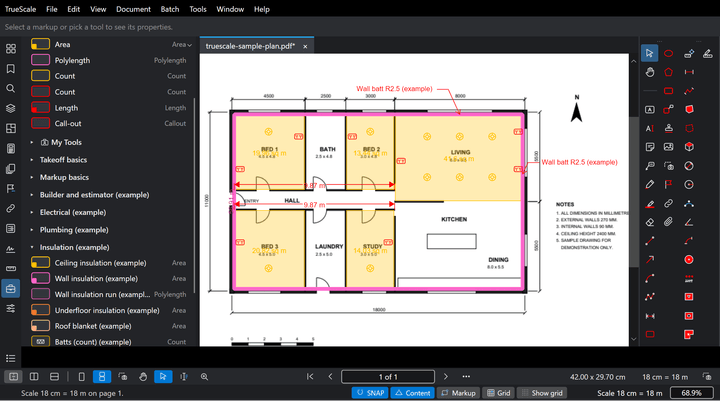
Measure a wall run
- Pick the wall insulation run from the Tool Chest.
- Click along the walls you are insulating, corner by corner. Hold Shift to keep each leg straight, and finish the run at the last corner.
- Open Properties and type the Wall height from the drawing or the specification, for example 2.4 m, or 2.7 m for higher ceilings. There is no preset height, so every run uses the height you give it. A bare number reads the way you mean it: on a metric drawing 2.7 and 2700 are both 2.7 m. Type the height on the tool itself (Tool Properties) and every run you draw with it starts with that height.
TrueScale shows the run’s length and its wall area (the length times the wall height). Change the height later and the area follows.
You can use the same idea on any length, polylength or perimeter measurement: give it a wall height in Properties, and its wall area appears.
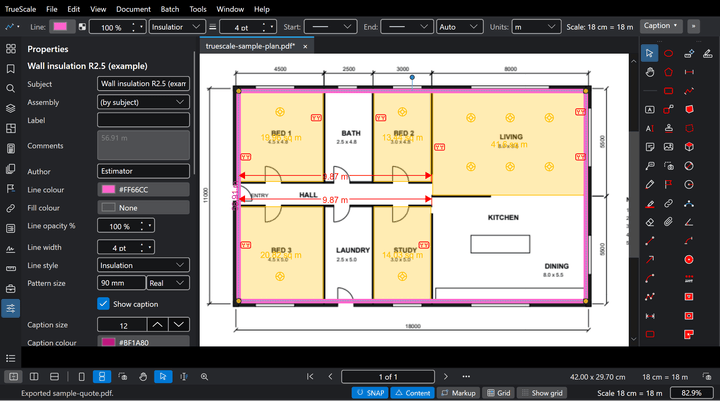
Different heights, different runs
Measure each height as its own run. A ground floor at 2.7 m and an upper floor at 2.4 m are two runs with two heights. The same goes for walls that take different products: external walls and internal acoustic walls are usually separate runs with separate subjects, so they total separately.
Openings
Windows and doors are not insulated. Two simple ways to deal with them:
- Measure the windows and doors as their own areas or counts, with their own subject, and take them off in your estimate or your spreadsheet.
- Or measure the wall itself as an area (the wall insulation area tool) on an elevation, and add cut-outs for the openings. If two cut-outs overlap, TrueScale merges them into one, so the area stays right.
Pick one way and use it on every job, so your numbers are comparable from quote to quote.
Show the batts on the plan
Clients and installers like to see what is being insulated. The insulation tools draw the run with a batt pattern, the loops you see on a wall section. In Properties, Pattern size sets the size of the loops on its own, either on paper or as a real thickness at the page scale (for example 90 mm), so the drawing reads clearly at any zoom.
Use call-outs to label the product on the plan, such as the R-value of the batt in each wall. The starter tools carry a Spec column (for example “Wall batt R2.5”) that you can change to your own product.
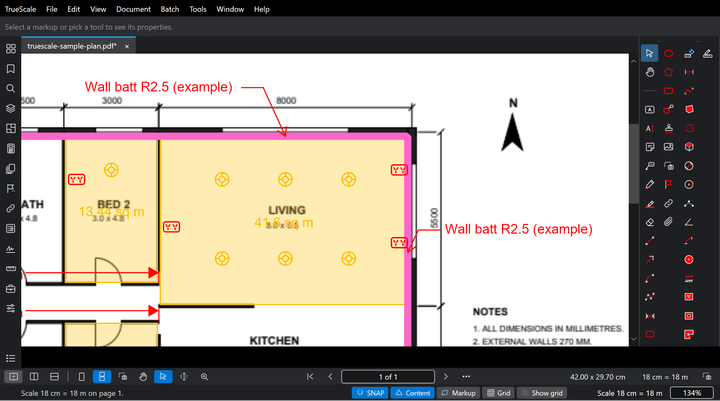
Totals in the Markups List
Open the Markups List with Alt+L. Every run is listed with its subject, length and wall area, and the Wall Area column has group totals. Group by subject to get one line per product, or by page to check each floor.
From the Markups List you can export the totals to Excel, or price them straight away in the Estimate panel (Shift+Alt+E): give the measurement an assembly as its subject, and materials, labour, waste and your margin are worked out for you.
Ceilings and floors
Ceilings and underfloor are plain areas. Use the ceiling insulation and underfloor insulation tools and trace the rooms on the plan. For a room that is not a simple rectangle, click each corner in turn.
Check your work
- Hide everything except your insulation layer and look at the plan. Gaps and double ups are easy to see.
- Compare the total wall run length with the perimeter of the building. Internal walls aside, they should be close.
- Spot check one wall by hand: its length times its height should match the wall area in the list.
Next steps
Once your wall areas are in the Markups List, you can link them to a quote in Excel that updates by itself whenever the drawing changes. The next guide shows how: How to link PDF takeoff quantities to an Excel quote.